Contents
StatefulSet控制器
StatefulSet控制器是一种提供排序和唯一性保证的特殊Pod控制器。当有与部署顺序、持久数据或固定网络等相关的特殊需求时,可 以使用StatefulSet控制器来进行更细粒度的控制。
StatefulSet控制器通常与面向数据的应用程序(如数据库)关联,它即使被重新分配到一个新的节点上,还是需要访问同一个存储卷的。
StatefulSet控制器对应于有状态服务(Deployment控制器对应于无状态服务),前者的功能如下所示。
实现稳定的持久化存储:Pod重新调度后还能访问相同的持久化数据,可基于PVC来实现。
实现稳定的网络标识:Pod重新调度后其PodName和HostName不变,基于无头Service(没有Cluster IP的Service)来实现。
实现有序部署、有序伸缩:Pod是有顺序的,在部署或者扩展的时候要依据定义的顺序依次执行(即从第一个到最后一个依次部 署,在下一个Pod运行之前所有的Pod必须都处于Running或Ready状态)。
实现有序收缩、有序删除:从最后一个开始,依次删除到第一个。
创建StatefulSet资源之前,先要保证集群中存在StorageClass,并使用headless service暴露服务 StatefulSet相较于Deployment,多了volumeClaimTemplates字段,即pvc存储的配置信息
yaml模板
apiVersion: apps/v1      #必填,版本号
kind: StatefulSet     #必填,资源类型
metadata:       #必填,元数据
  name: <name>-sts     #必填,资源名称
  namespace: <namespace>    #Pod所属的命名空间
spec:         #必填,部署的详细定义
  selector: #必填,标签选择
    matchLabels: #必填,标签匹配
      key: <value> #必填,通过此标签匹配对应pod<key: value>
  serviceName: string # Headless Service资源名称
  replicas: int # 副本数量
  template: #必填,应用容器模版定义
    metadata: #必填,元数据
      labels:  # 标签
        key: <value> #必填,与上面matchLabels的标签相同
    spec:
      containers: #此处参考pod的containers
  volumeClaimTemplates: #必填,+pvc模板
    - metadata:       #必填,元数据
        name: <name>-depolyment     #必填,资源名称
      spec:
        accessModes: [ "ReadWriteOnce | ReadOnlyMany | ReadWriteMany" ] #必填,访问模式
        storageClassName: strint  #存储类名,改为集群中已存在的
        resources: # 存储卷需要占用的资源量最小值
          requests: # 请求空间大小
            storage: 1Gi # 空间大小值
yaml示例:以nginx服务使用nfs共享存储为例
#先定义了一个名为myapp-svc的Headless Service资源,用于为关联到的每个Pod资源创建DNS资源记录。
apiVersion: v1
kind: Service
metadata:
  name: myapp-svc
  labels:
    app: myapp-svc
spec:
  ports:
  - port: 80
    name: web
  clusterIP: None
  selector:
    app: myapp-pod

---
# 定义多个使用NFS存储后端的PV,空间大小为2GB,仅支持单路的读写操作。
apiVersion: v1
kind: PersistentVolume
metadata:
  name: nfs-pv
spec:
  capacity:
    storage: 2Gi
  accessModes:
    - ReadWriteOnce
  persistentVolumeReclaimPolicy: Recycle
  storageClassName: nfs
  nfs:
    path: /nfs/data1
    server: 172.17.0.2
---
# 定义了一个名为myapp的StatefulSet资源,它通过Pod模板创建了两个Pod资源副本,并基于volumeClaimTemplates(存储卷申请模板)向nfs存储类请求动态供给PV,从而为每个Pod资源提供大小为1GB的专用存储卷。
apiVersion: apps/v1
kind: StatefulSet
metadata:
  name: myapp-sts
spec:
  selector:
    matchLabels:
      app: myapp-pod
  serviceName: myapp-svc
  replicas: 2
  template:
    metadata:
      labels:
        app: myapp-pod
    spec:
      containers:
      - name: nginx
        image: k8s.gcr.io/nginx-slim:0.8
        ports:
        - containerPort: 80
          name: web
        volumeMounts:
        - name: myapp-data
          mountPath: /usr/share/nginx/html
  volumeClaimTemplates:
  - metadata:
      name: myapp-data
    spec:
      accessModes: [ "ReadWriteOnce" ]
      storageClassName: "nfs"
      resources:
        requests:
          storage: 1Gi
1.statefulset的组成
StatefulSet控制器由3个部分组成
无头Service:用于为Pod资源标识符生成可解析的DNS记录。
volumeClaimTemplates:基于静态或动态PV供给方式为Pod资源提供专有的固定存储。
StatefulSet:管理Pod资源。
StatefulSet控制器的组成

2.为什么要用StatefulSet控制器?
Deployment控制器下的每一个Pod都毫无区别地提供服务。
但StatefulSet控制器下的Pod则不同,虽然各个Pod的定义是一样的,但因为数据不同,所提供的服务是有差异的。
分布式存储系统就适合使用StatefulSet控制器,由Pod A存储一部分数据并提供相关服务,由Pod B存储另一部分数据并提供相关服务。
又比如有些服务会临时保存客户请求的数据,如使用服务端Session方式存放部分信息的业务网站,由于Session的不同,Pod A和Pod B能提供的服务也不尽相同,这种场景也适合使用StatefulSet控制器。
因为在上述场景下每一个有状态的Pod提供的服务都不一样,所以每一个Pod不能被随意取代,必须有序分配且必须为其分配唯一的标识。
Pod名称将是它们的唯一标识符,和Deployment控制器下的Pod不同,即使有状态的Pod发生故障并被重建,Pod名称也会和原来的一模一样。
因为各个有状态的Pod也必须要拥有一个唯一的网络标识符以访问具体的某个Pod,所以会用到无头Service,无头Service可以给每个 Pod分配一个唯一的DNS名称。
有状态的Pod都会使用到持久存储(如果没有持久存储,Pod发生故障时数据就没有了)。
如前所述,有状态的Pod的最大特点是各个Pod中的数据是不一样的,所以各个Pod无法共用同一个存储卷。
需要单独分配各自的PV和PVC
因为每个Pod要有各自专用的存储卷,所以并不是在Pod模板中定义(若在Pod模板中定义,那么每个Pod都用的同一个存储卷)StatefulSet控制器的存储卷配置,而是在StatefulSet控制器模板的volumeClaimTemplate属性中定义存储卷的申请模板,并会为每个 Pod生成不同的PVC且各自绑定PV,从而使各个Pod拥有各自专用的存储卷。
因为每个Pod都会产生各自专用的PVC及PV,所以StatefulSet控制器的存储最好通过StorageClass来动态创建。
当然,也可以通过手动创建各个预设的PV,只是这个过程会相当麻烦。
3.StatefulSet控制器的基本操作
定义模板文件,创建一个名为examplestatefulset.yml的模板文件
kind: Service
apiVersion: v1
metadata:
  name: examplestatefulservice
spec:
  selector:
    example: exampleforstateful
  # headless service
  clusterIP: None
  ports:
    - protocol: TCP
      port: 8080
      targetPort: 80
  type: ClusterIP

---
apiVersion: apps/v1
kind: StatefulSet
metadata:
  name: examplestatefulset
spec:
  replicas: 3
  serviceName: "examplestatefulservice"
  selector:
    matchLabels:
      example: exampleforstateful
  template:
    metadata:
      labels:
        example: exampleforstateful
    spec:
      containers:
      - name: pythonserviceforstateful
        image: python:3.7
        imagePullPolicy: IfNotPresent
        command: ['sh', '-c']
        args: ['echo "The host is $(hostname)" >> /dir/data; echo "<p>The host is $(hostname)</p>" > index.html; python -m http.server 80']

        volumeMounts:
        - name: statefuldata
          mountPath: /dir
        ports:
        - name: http
          containerPort: 80

  volumeClaimTemplates:
    - metadata:
        name: statefuldata
      spec:
        accessModes: [ "ReadWriteOnce" ]
        storageClassName: "managed-nfs-storage"
        resources:
          requests:
            storage: 200Mi
这个模板主要分为3个部分。首先,创建了一个无头Service,其名称为examplestatefulservice。它会通过标签选择器关联到各个标签为
example: exampleforstateful的Pod上。
然后,创建了一个StatefulSet模板。该StatefulSet模板的前半部分的定义和Deployment模板相似,定义了3个Pod副本,其容器为 “python:3.7”镜像,其目的是搭建服务。在启动容器时,会先以追加方式向/dir/data文件写入一串文本”The host is \((hostname)", 这串文本使用\)(hostname)环境变量获取当前Pod名称。/dir目录通过volumeMounts属性映射到名为statefuldata的存储卷申请模板 上,这在写入文本时会直接写入存储卷中。
接下来,执行echo "<p>The host is $(hostname)</p> "index.html命令,将一段HTML代码插入index.html文件中,这样
在访问index.html时就可以知道访问的是哪个Pod。
另外,通过python -m http.server 80命令,搭建一个简单的Web服务,并令服务对应的端口为80。
StatefulSet模板的后半部分是存储卷申请模板,其定义的内容和PVC模板的差不多,但要注意,这里批量定义了PVC。 storageClassName属性设置为managed-nfs-storage,与上一节中创建的StorageClass名称保持一致。
requests为storage:200Mi,这表示为每一个Pod都申请200MiB的存储空间。
接下来,执行以下命令,创建StatefulSet控制器的相关资源。
$ kubectl apply -f examplestatefulset.yml
在创建过程中,在不同时段通过$ kubectl get pod进行查看,会发现Pod是按照顺序依次创建的。
Kubernetes会先创建第一个Pod,第二个Pod处于Pending状态。
第一个Pod创建完毕后创建第二个Pod,此时第三个Pod处于Pending状态。
前两个Pod创建完毕后,再创建第三个Pod。Pod的名称和Deployment控制器下的Pod不一样,名称末尾并没有生成随机字符串,而是按照数字顺序从0开始依次向上累加。
StatefulSet控制器下有序创建的各个Pod

通过以下命令,可以查看StatefulSet控制器的总体状态。
$ kubectl get statefulset
NAME                 READY   AGE
examplestatefulset   3/3     82s
通过以下命令,可以查看StatefulSet控制器的详细信息。
$ kubectl describe statefulset examplestatefulset
Name:               examplestatefulset
Namespace:          default
CreationTimestamp:  Mon, 18 Apr 2022 14:59:01 +0800
Selector:           example=exampleforstateful
Labels:             <none>
Annotations:        <none>
Replicas:           3 desired | 3 total
Update Strategy:    RollingUpdate
  Partition:        0
Pods Status:        3 Running / 0 Waiting / 0 Succeeded / 0 Failed
Pod Template:
  Labels:  example=exampleforstateful
  Containers:
   pythonserviceforstateful:
    Image:      python:3.7
    Port:       80/TCP
    Host Port:  0/TCP
    Command:
      sh
      -c
    Args:
      echo "The host is $(hostname)" >> /dir/data; echo "<p>The host is $(hostname)</p>" > index.html; python -m http.server 80
    Environment:  <none>
    Mounts:
      /dir from statefuldata (rw)
  Volumes:  <none>
Volume Claims:
  Name:          statefuldata
  StorageClass:  managed-nfs-storage
  Labels:        <none>
  Annotations:   <none>
  Capacity:      200Mi
  Access Modes:  [ReadWriteOnce]
Events:
  Type    Reason            Age    From                    Message
  ----    ------            ----   ----                    -------
  Normal  SuccessfulCreate  5m6s   statefulset-controller  create Claim statefuldata-examplestatefulset-0 Pod examplestatefulset-0 in StatefulSet e             xamplestatefulset success
  Normal  SuccessfulCreate  5m6s   statefulset-controller  create Pod examplestatefulset-0 in StatefulSet examplestatefulset successful
  Normal  SuccessfulCreate  5m3s   statefulset-controller  create Claim statefuldata-examplestatefulset-1 Pod examplestatefulset-1 in StatefulSet e             xamplestatefulset success
  Normal  SuccessfulCreate  5m3s   statefulset-controller  create Pod examplestatefulset-1 in StatefulSet examplestatefulset successful
  Normal  SuccessfulCreate  3m47s  statefulset-controller  create Claim statefuldata-examplestatefulset-2 Pod examplestatefulset-2 in StatefulSet e             xamplestatefulset success
  Normal  SuccessfulCreate  3m47s  statefulset-controller  create Pod examplestatefulset-2 in StatefulSet examplestatefulset successful
4.PVC及PV的使用
我们先检查存储卷的使用情况。此时如果通过$ kubectl getpvc以及$ kubectl get pv命令进行查询,可以看到StatefulSet
控制器为每个Pod都创建了各自专用的PVC及PV。
$ kubectl get pv|grep default/statefuldata-examplestatefulset
pvc-0bd1af19-8af1-41b1-ba61-8933ac9fb8f2   200Mi      RWO            Delete           Bound    default/statefuldata-examplestatefulset-2               managed-nfs-storage            6m46s
pvc-3144e3df-cf7c-46c6-a285-d2719b9d5161   200Mi      RWO            Delete           Bound    default/statefuldata-examplestatefulset-1               managed-nfs-storage            8m2s
pvc-9fa9ae39-a778-4d31-aa38-37c84de9d7fa   200Mi      RWO            Delete           Bound    default/statefuldata-examplestatefulset-0               managed-nfs-storage            8m4s

$ kubectl get pvc
NAME                                STATUS   VOLUME                                     CAPACITY   ACCESS MODES   STORAGECLASS          AGE
statefuldata-examplestatefulset-0   Bound    pvc-9fa9ae39-a778-4d31-aa38-37c84de9d7fa   200Mi      RWO            managed-nfs-storage   7m41s
statefuldata-examplestatefulset-1   Bound    pvc-3144e3df-cf7c-46c6-a285-d2719b9d5161   200Mi      RWO            managed-nfs-storage   7m38s
statefuldata-examplestatefulset-2   Bound    pvc-0bd1af19-8af1-41b1-ba61-8933ac9fb8f2   200Mi      RWO            managed-nfs-storage   6m22s
任意挑选一个PV,通过$ kubectl describe pv命令查看详情,可以看到它在NFS服务器共享目录上创建的专用目录,
$ kubectl describe pv pvc-0bd1af19-8af1-41b1-ba61-8933ac9fb8f2
Name:            pvc-0bd1af19-8af1-41b1-ba61-8933ac9fb8f2
Labels:          <none>
Annotations:     pv.kubernetes.io/provisioned-by: fuseim.pri/ifs
Finalizers:      [kubernetes.io/pv-protection]
StorageClass:    managed-nfs-storage
Status:          Bound
Claim:           default/statefuldata-examplestatefulset-2
Reclaim Policy:  Delete
Access Modes:    RWO
VolumeMode:      Filesystem
Capacity:        200Mi
Node Affinity:   <none>
Message:
Source:
    Type:      NFS (an NFS mount that lasts the lifetime of a pod)
    Server:    192.168.1.60
    Path:      /nfstest/default-statefuldata-examplestatefulset-2-pvc-0bd1af19-8af1-41b1-ba61-8933ac9fb8f2
    ReadOnly:  false
Events:        <none>
在NFS服务器上执行以下命令,查看Pod是否已成功向该目录写入文件。
执行结果如下所示,可以看到Pod已成功向它的专属存储卷中写入数据。
$ cat /data/nfs/nfstest/default-statefuldata-examplestatefulset-0-pvc-9fa9ae39-a778-4d31-aa38-37c84de9d7fa/data
The host is examplestatefulset-0
对于其余两个Pod也是一样的,先通过$ kubectl describe pv pvName命令查看其专属目录位置,然后执行命令查看文件是否写入。
$ kubectl describe pv pvc-3144e3df-cf7c-46c6-a285-d2719b9d5161
Name:            pvc-3144e3df-cf7c-46c6-a285-d2719b9d5161
Labels:          <none>
Annotations:     pv.kubernetes.io/provisioned-by: fuseim.pri/ifs
Finalizers:      [kubernetes.io/pv-protection]
StorageClass:    managed-nfs-storage
Status:          Bound
Claim:           default/statefuldata-examplestatefulset-1
Reclaim Policy:  Delete
Access Modes:    RWO
VolumeMode:      Filesystem
Capacity:        200Mi
Node Affinity:   <none>
Message:
Source:
    Type:      NFS (an NFS mount that lasts the lifetime of a pod)
    Server:    192.168.1.60
    Path:      /nfstest/default-statefuldata-examplestatefulset-1-pvc-3144e3df-cf7c-46c6-a285-d2719b9d5161
    ReadOnly:  false
Events:        <none>

$ cat /data/nfs/nfstest/default-statefuldata-examplestatefulset-1-pvc-3144e3df-cf7c-46c6-a285-d2719b9d5161/data
The host is examplestatefulset-1
结果:每个Pod都往各自的存储卷中写入了数据。
5.无头Service的访问
我们检查Service的发布情况。使用$ kubectl get svc命令可以看到已经创建了一个无头Service。
$ kubectl get svc
NAME                     TYPE        CLUSTER-IP   EXTERNAL-IP   PORT(S)    AGE
examplestatefulservice   ClusterIP   None         <none>        8080/TCP   11m
kubernetes               ClusterIP   10.96.0.1    <none>        443/TCP    173d
由于这个Service无法由集群内外的机器直接访问,因此只能由Pod访问,而且需要通过DNS形式来访问,具体访问形式为
{ServiceName}.{Namespace}.svc.{ClusterDomain}。
svc是Service的缩写(固定格式);
ClusterDomain表示集群域,本例中默认的集群域为cluster.local;
前面两个字段则是根据Service定义决定的,在这个例子中ServiceName为examplestatefulservice,而Namespace我们没有在yml文件中指定,默认值为Default。
在访问这个地址之前,我们先创建一个测试用的Pod,用它来尝试访问Service。命令如下。
examplepodforheadlessservice.yml
apiVersion: v1
kind: Pod
metadata:
  name: examplepodforheadlessservice
spec:
  containers:
  - name: testcontainer
    image: docker.io/appropriate/curl
    imagePullPolicy: IfNotPresent
    command: ['sh', '-c']
    args: ['echo "test pod for headless service!"; sleep 3600']
这个Pod并没有什么特别之处,其镜像为appropriate/curl。该镜像是一种工具箱,里面存放了一些测试网络和DNS使用的工具(例 如curl和nslookup等),可用于测试现在的Service。通过sleep3600命令,可让该容器长期处于运行状态。
通过模板创建Pod。
$ kubectl apply -f examplepodforheadlessservice.yml
Pod创建完成后,就可以通过以下命令进入Pod内部,这样就可以在Pod内部执行命令行。
进入容器内部后,可以执行nslookup命令查询DNS信息,获得这个DNS下面的IP地址列表。之前已经提到,Kubernetes中的DNS资源访 问方式为{ServiceName}.{Namespace}. svc.{ClusterDomain},本例中的具体命令如下。
$ kubectl exec -it pod/examplepodforheadlessservice -- /bin/sh
/ # nslookup examplestatefulservice.default.svc.cluster.local
nslookup: can't resolve '(null)': Name does not resolve

Name:      examplestatefulservice.default.svc.cluster.local
Address 1: 10.0.16.28 examplestatefulset-1.examplestatefulservice.default.svc.cluster.local
Address 2: 10.0.32.106 examplestatefulset-2.examplestatefulservice.default.svc.cluster.local
Address 3: 10.0.36.231 examplestatefulset-0.examplestatefulservice.default.svc.cluster.local
可以看到,一共返回了3个IP地址,这些IP地址正是之前创建的各个Pod的IP地址,而Kubernetes又为每个 Pod地址创建了对应的专属域名。访问这些专属域名就可以访问指定Pod提供的服务
当然,也可以直接使用无头Service的总域名来访问服务,如下面所示。通过这种方式访问的服务是随机的,这对于Deployment控制 器提供的无状态Pod没有问题,但如前所述,对于StatefulSet控制器提供的有状态Pod而言,每个Pod提供的服务都是不同的,在调用时必须指明调用哪一个Pod提供的服务。
/ # curl examplestatefulservice.default.svc.cluster.local
<p>The host is examplestatefulset-1</p>
/ # curl examplestatefulservice.default.svc.cluster.local
<p>The host is examplestatefulset-0</p>
/ # curl examplestatefulservice.default.svc.cluster.local
<p>The host is examplestatefulset-1</p>
/ # curl examplestatefulservice.default.svc.cluster.local
<p>The host is examplestatefulset-2</p>
在无头Service中,每一个Pod都会生成专属的访问域名,其访问格式为{PodName}. {ServiceName}.{Namespace}.svc. {ClusterDomain}。每个域名通过DNS查询都可以解析出Pod的IP地址,例如,使用以下命令
/ # nslookup examplestatefulset-0.examplestatefulservice.default.svc.cluster.local
nslookup: can't resolve '(null)': Name does not resolve

Name:      examplestatefulset-0.examplestatefulservice.default.svc.cluster.local
Address 1: 10.0.36.231 examplestatefulset-0.examplestatefulservice.default.svc.cluster.local


/ # nslookup examplestatefulset-1.examplestatefulservice.default.svc.cluster.local
nslookup: can't resolve '(null)': Name does not resolve

Name:      examplestatefulset-1.examplestatefulservice.default.svc.cluster.local
Address 1: 10.0.16.28 examplestatefulset-1.examplestatefulservice.default.svc.cluster.local


/ # nslookup examplestatefulset-2.examplestatefulservice.default.svc.cluster.local
nslookup: can't resolve '(null)': Name does not resolve

Name:      examplestatefulset-2.examplestatefulservice.default.svc.cluster.local
Address 1: 10.0.32.106 examplestatefulset-2.examplestatefulservice.default.svc.cluster.local
综上所述,要访问由不同的有状态Pod提供的服务,只需要访问其专属域名即可。
/ # curl examplestatefulset-0.examplestatefulservice.default.svc.cluster.local
<p>The host is examplestatefulset-0</p>

/ # curl examplestatefulset-1.examplestatefulservice.default.svc.cluster.local
<p>The host is examplestatefulset-1</p>

/ # curl examplestatefulset-2.examplestatefulservice.default.svc.cluster.local
<p>The host is examplestatefulset-2</p>
可以看到每个域名都可以成功返回各自的结果。
6.Pod的重建
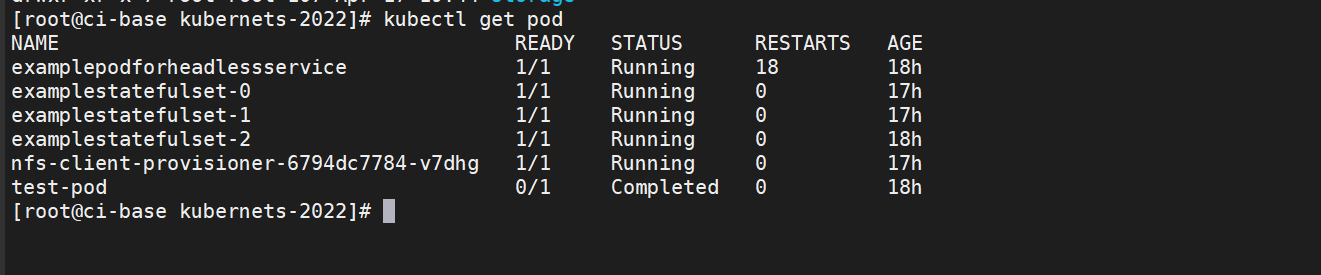
可以模拟Pod发生故障时的场景。假设现在examplestatefulset-1发生故障(例如,人为删除),请执行以下命令。
$ kubectl delete pod/examplestatefulset-1
因为在之前模板中replicas设置为3,这表示会保留3个稳定副本,所以Pod会重建。可以看到,Pod 重建后的名称一模一样,Pod的 IP地址会有变化(但不会有实际影响)。
如图:
执行以下命令,输出这个 Pod 专属的存储卷中文件的内容,查看是否仍然调用了同一个存储。
$ cat /data/nfs/nfstest/default-statefuldata-examplestatefulset-1-pvc-3144e3df-cf7c-46c6-a285-d2719b9d5161/data
The host is examplestatefulset-1
The host is examplestatefulset-1
因为在之前的Pod定义中Pod启动时会以追加文本的形式向文件中写入数据,所以Pod重建后,会再写一条数据。
因为重建后的Pod使用的还是同一个PVC和PV,所以仍然在同一个文件上进行编辑。
查询该文件会看到两条文本,一条是之前由被删除的Pod在启动时写的,一条是重建时写的
7.StatefulSet控制器的伸缩与更新
和Deployment控制器一样,StatefulSet控制器也可以实现动态伸缩,只需要修改配置模板中的replicas属性然后执行应用即可。
但与Deployment控制器不同的地方在于,Pod是有序伸缩的,就像创建StatefulSet控制器时依次创建Pod一样。在扩容时,后续新增的Pod会从前往后依次创建,创建完成后才开始下一个 Pod 的创建;
在缩容时,会先从编号最大的 Pod开始,从后往前依次删除,完全删除后才开始下一个Pod的删除。
StatefulSet控制器有两种更新策略,可以在模板中通过.spec.updateStrategy属性进行设置。
OnDelete更新策略,这是默认的向后兼容的更新策略。使用OnDelete更新策略更新StatefulSet模板后,只有在手动删除旧的Pod时才会创建新的Pod。
RollingUpdate策略。在更新StatefulSet控制器模板后,旧的Pod将被终止,并且将以受控方式自动创建新的 Pod。
7.1 sts和deployment的滚动更新差异
StatefulSet控制器和Deployment控制器的滚动更新,有一些细节上的差异。
因为StatefulSet控制器是有序的,所以它会从编号最大的Pod到最小的Pod依次更新,而且在更新前不会立即删除旧的Pod,而是 等新的Pod已完全创建完毕且处于Running状态时,才会替换并删除旧的Pod。
StatefulSet控制器拥有独有的更新属性.spec.updateStrategy.rollingUpdate.partition。这种方式类似于金丝雀部署,如果将partition设置为4,只有编号大于或等于4的Pod才会进行更新,编号小于partition的Pod将不会更新。如果已经更新的Pod通过验证,则再将partition改为0,更新其余Pod即可。